

Until well into the 19th century, suspenders were considered underwear for men and, in keeping with contemporary tastes, they were carefully hidden under the waistcoat. What a pity! It really doesn't have to be.

Suspenders quickly became a men's accessory that, in addition to their purely practical use, can also be shown. The mostly elastic suspenders just keep a man's trousers at the correct height at the waist. Regardless of whether the waist is more modern in the hip area or classically high cut, about two fingers wide above the navel. The latter, ask your tailor, is a classic style as we know it from the first half of the 20th century: high-cut trousers, a suitably shortened waistcoat and then a jacket. And this is exactly where suspenders with buttons (instead of the ones with metal clips often used today) are used.

Buttoned suspenders - a man's useful prop
A man's trousers, especially if they are classically high, offer numerous options for attaching the buttons required for suspenders with fastening loops. But first the question of faith: should the buttons be attached to the inside or outside of the pants? The answer is very simple: it doesn't matter. Let your sense of style guide you. In general, one can say that in earlier times the buttons were mostly visible on the outside. Buttons in the same color as the trousers are recommended here. Even with a somewhat rustic style (workwear, corduroy pants, Peaky Blinders style) it is advisable to attach the buttons on the outside to underline the style. Buttons sewn on the inside of the waistband to attach the suspenders look rather elegant and reserved.

How do I sew buttons for suspenders?
At this point we want to refrain from explaining to the gentleman reader how to sew on a button. This knowledge, similar to shining shoes or mixing a martini, is part of every man's basic vocabulary. If in doubt, consult a trusted tailoring shop. That shouldn't cost more than 10 euros - for advice and seams. Now that the inside or outside of the buttons (remember: a matter of judgment and taste) has been dealt with, the issue is the spacing. Here, too, there is no fixed rule, but there are circumstances that must be taken into account. For example, the classic Y-shaped suspenders are attached twice at the front and once in the center at the back. There are two loops in play here, and there is a need to have a total of six buttons ready. A distance of approximately 12 centimeters to the middle of the pants (slit with zip or button placket) applies for the front and then a distance of six centimeters between the two loops. At the back from the middle of the pants (center seam) three centimeters to the left and three centimeters to the right. But, gentlemen, do not be afraid to vary this.

Braces with textile or leather loops?
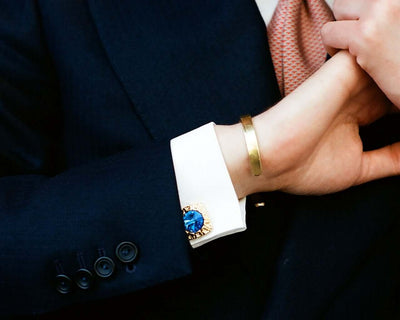
In addition to the suspenders with clips, we offer suspenders with leather loops and clips: Combi. A leather flap can be opened and you can use the leather loops for buttons or alternatively clips. But by no means both. The suspenders that have a textile loop to attach to the buttons are very elegant: Classic. The exact position of the suspender buttons is an individual matter. Take it easy and balanced - not too extreme outside or inside. Always pay attention to comfort. If the waistband consists of several well-made layers, the buttons can be sewn on from the inside so that nothing can be seen on the outside. That does not have to be that way. If in doubt, consult your tailor. You can get high waist trousers like in our pictures in Berlin at Bleibtreustraße (near Ku'damm) from Maximilian Mogg.
Author: Andreas Thenhaus
Photos: Floy Gründig
Graphic: Nina Spagnol
Read more: